
This is one of my favourite craft activities. It can be quite fiddly work and takes time, but the results are brilliant (and I find it quite therapeutic). It is also quite versatile, I stared by making tube-shaped earrings, but as you can see from the photo have also used the same method to make a bracelet, and a choke necklace by not sewing it up into a tube (or even key rings if you don’t want to make jewelry). You can have almost any design you like, so long as you can fit it into a Peyote stitch pattern (like a brick work pattern) which you can download from The Bead Shop (Nottingham). Alternatively you can buy packs that give you both the beads and patterns to work on.
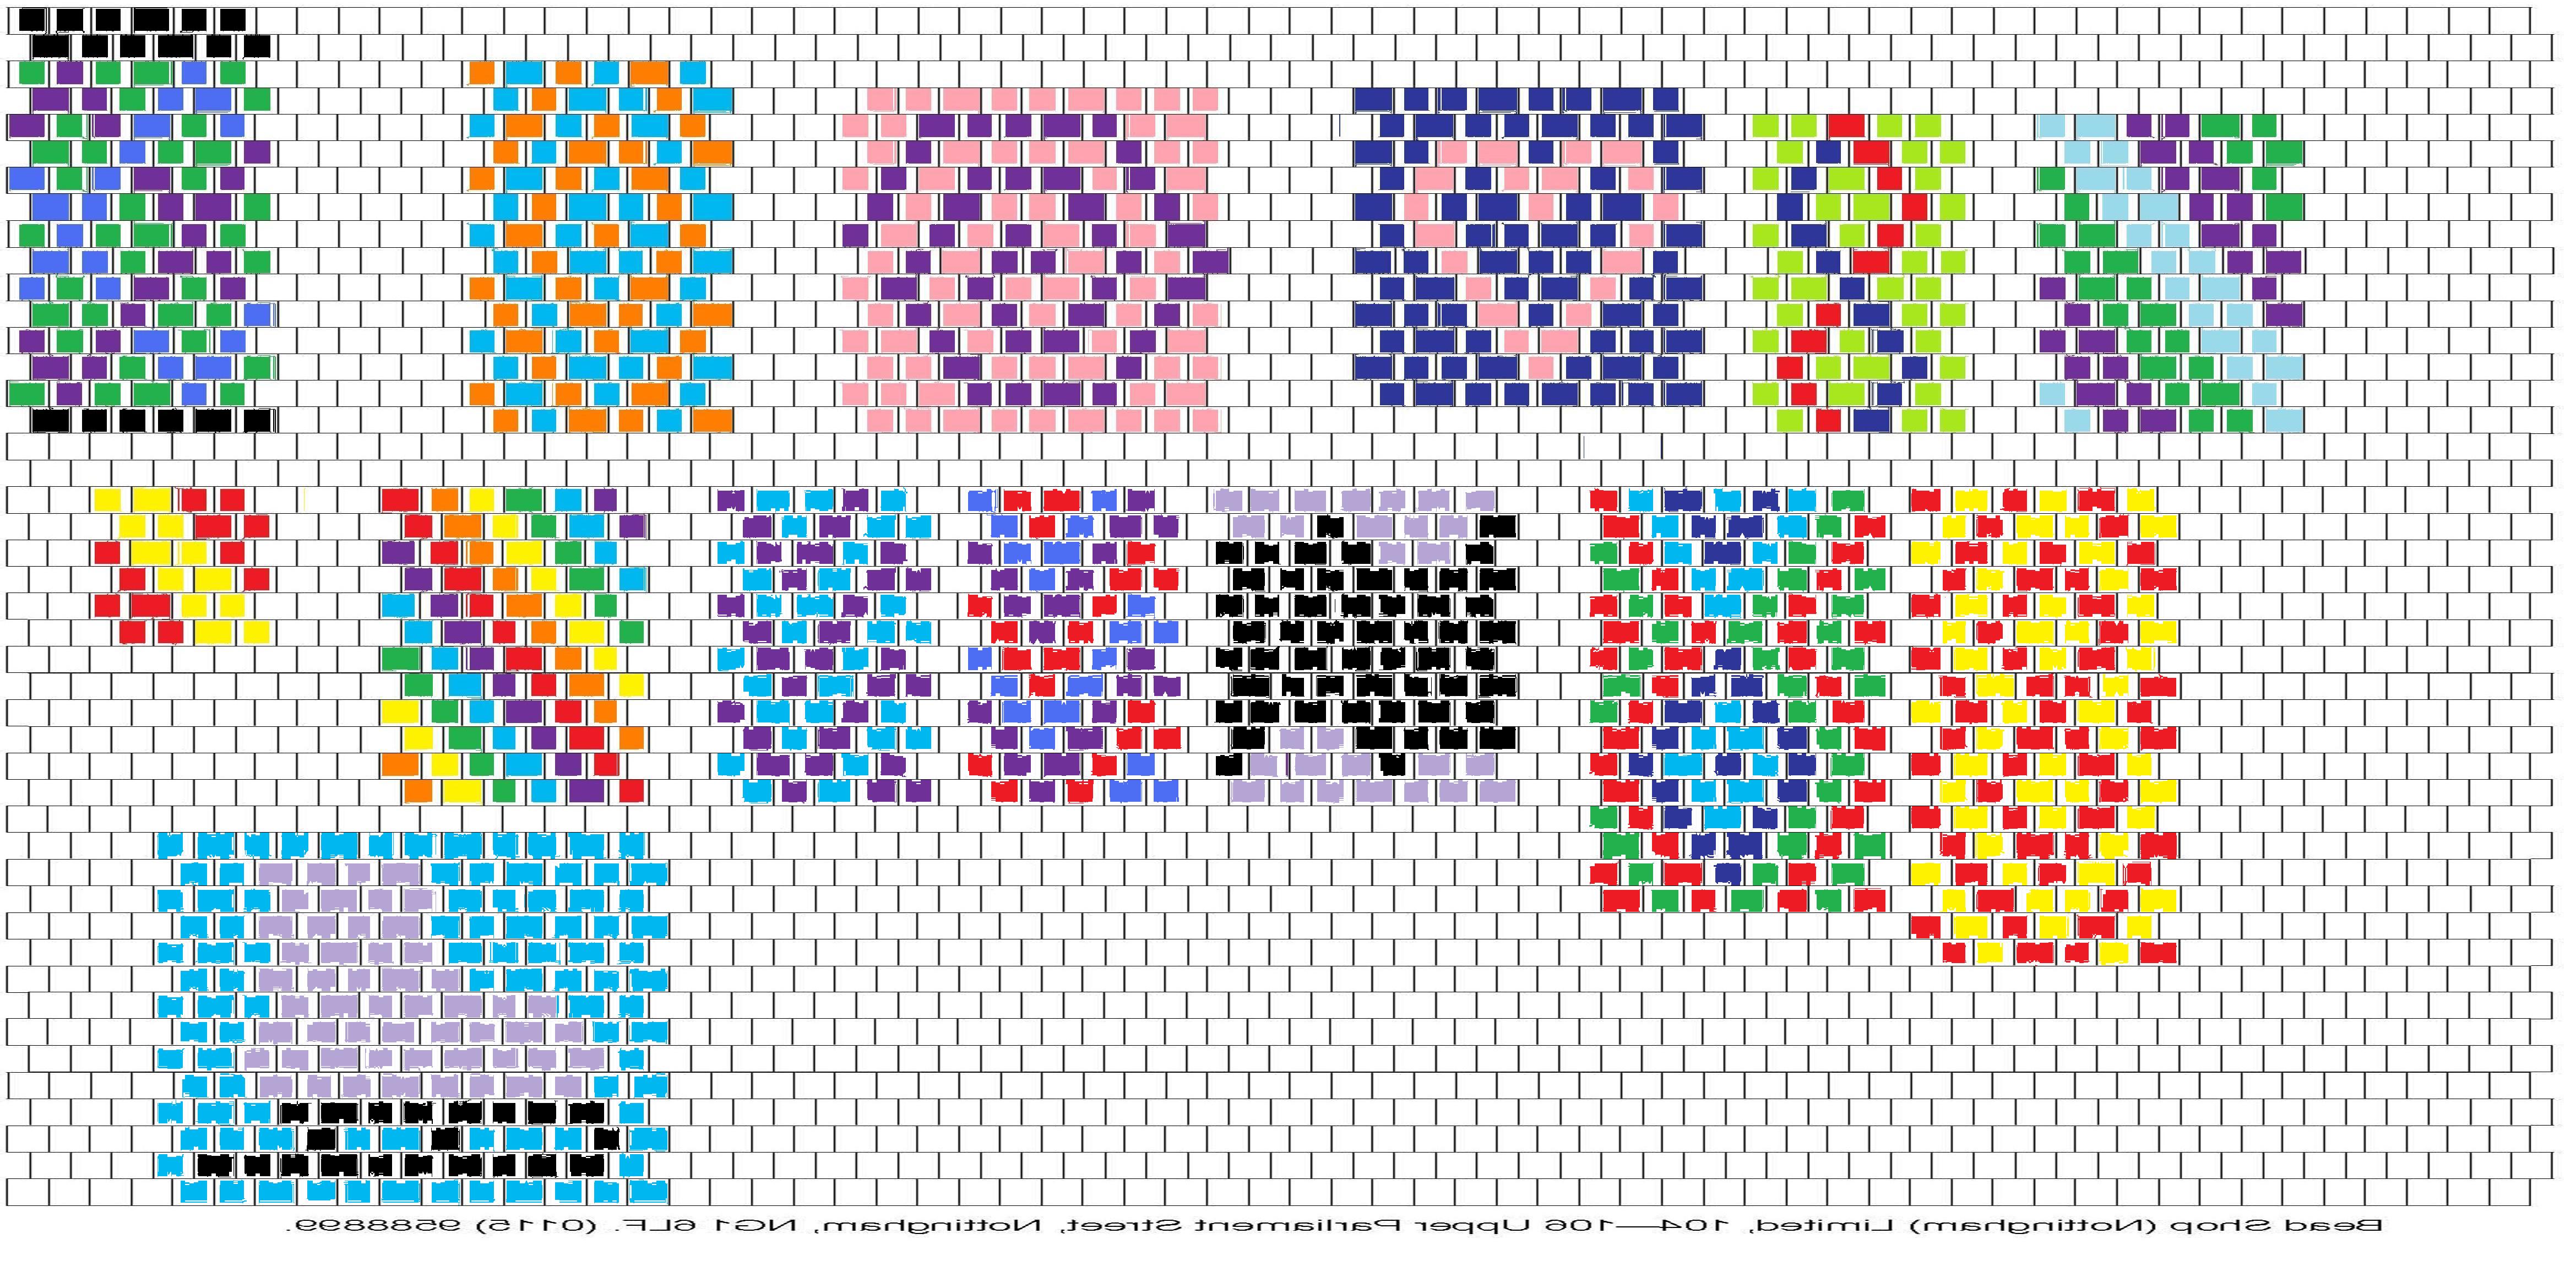
Some patterns I’ve drawn and used
You will need:
- A pattern
- Seed beads
- Strong thread (about 1m, but depends on length of work, you can attach a new thread if needed by re-sewing through beads you’ve already stitched to hold the thread in place)
- Fine needle
- Sticky-tape
- Jump-ring /Fishhook earring/ Chain (to attach finished article to)
Method:
- Sticky-tape one end of the thread to a solid surface, e.g. your work bench.
- Thread on the first two rows of beads starting from the end that has the indented row at the end.

Bead to start with indicated. Beads from pattern to include in first row

My first row, using beads from 1st and 2nd row of pattern
- Then thread on the first bead of the third row, miss the first bead of the first row and thread the needle through the first bead of the second row (the second bead you come to on your thread).

First bead of 3rd row attached
- Repeat this for the whole of the third row.

3rd row complete
- Turn and thread on the first bead of the 4th row. Now the work should be taking shape so you still miss out every other bead, but the bead you need to thread the needle through is slightly sticking out so is more obvious.

First half of 4th row
- Repeat this for all the rows

All rows completed
- To form a tube stitch through the beads sticking out of both ends of the work (beads making up the first and last rows).

Half of work stitched into a tube
- Take the work off the solid surface.
- Secure your work by threading the thread back through some of the beads and then bring the needle up inside the work so that the loose ends of the thread are sticking out of the top of the work. (you need to secure both ends of the thread)

Finished work, ready to attach
- Use the loose ends of the thread to attach the work to the fish-hook earring, jump ring, or whatever else you’ve chosen to fix your work too.


You can adapt the last parts of this method to leave the work flat rather than tube-shaped. If you want it to be tube-shaped it needs to be at least 5 beads wide and no more than 8 beads wide, I find 6/7 wide works best but it will depend on your beads. If you go smaller than 5 it tends to be too tight to get a nice tube-shaped and any more than 8 wide and it’s a very floppy tube that doesn’t hold its shape.
Enjoy!
